
I thought I would explain the very complicated process of Lithography stones. This will be lengthy, so bear with me! And don't try this at home (mainly because you won't have access to hardly any of these supplies).

First, you pick a stone. This one was my friend; I used it for every stone assignment in the class.

Then you have to grind the stone down with a levigator. I unfortunately don't have any pictures of this process, but it involves varied sizes of grit, a spray hose, and the levigator itself- a heavy, round wheel with a handle you spin over the grit, to smooth down the stone. This eliminates the old image on the stone and levels it out.


Next, you transfer your drawing onto the stone.


I used autographic ink to recreate the image. This ink is one of several greasy mediums that can be used on a lithographic stone. This needs to sit overnight.

Next is the first etch. This is a dangerous step, so you need to wear a mask and gloves!


After preparing the workspace, brush talc and rosin over the image to solidify it.


Then you made the etch mixture. First pour gum arabic into the etch glasses. Then add drops of nitric acid; the more drops the hotter the etch. I used this chart to figure out how much acid to use.


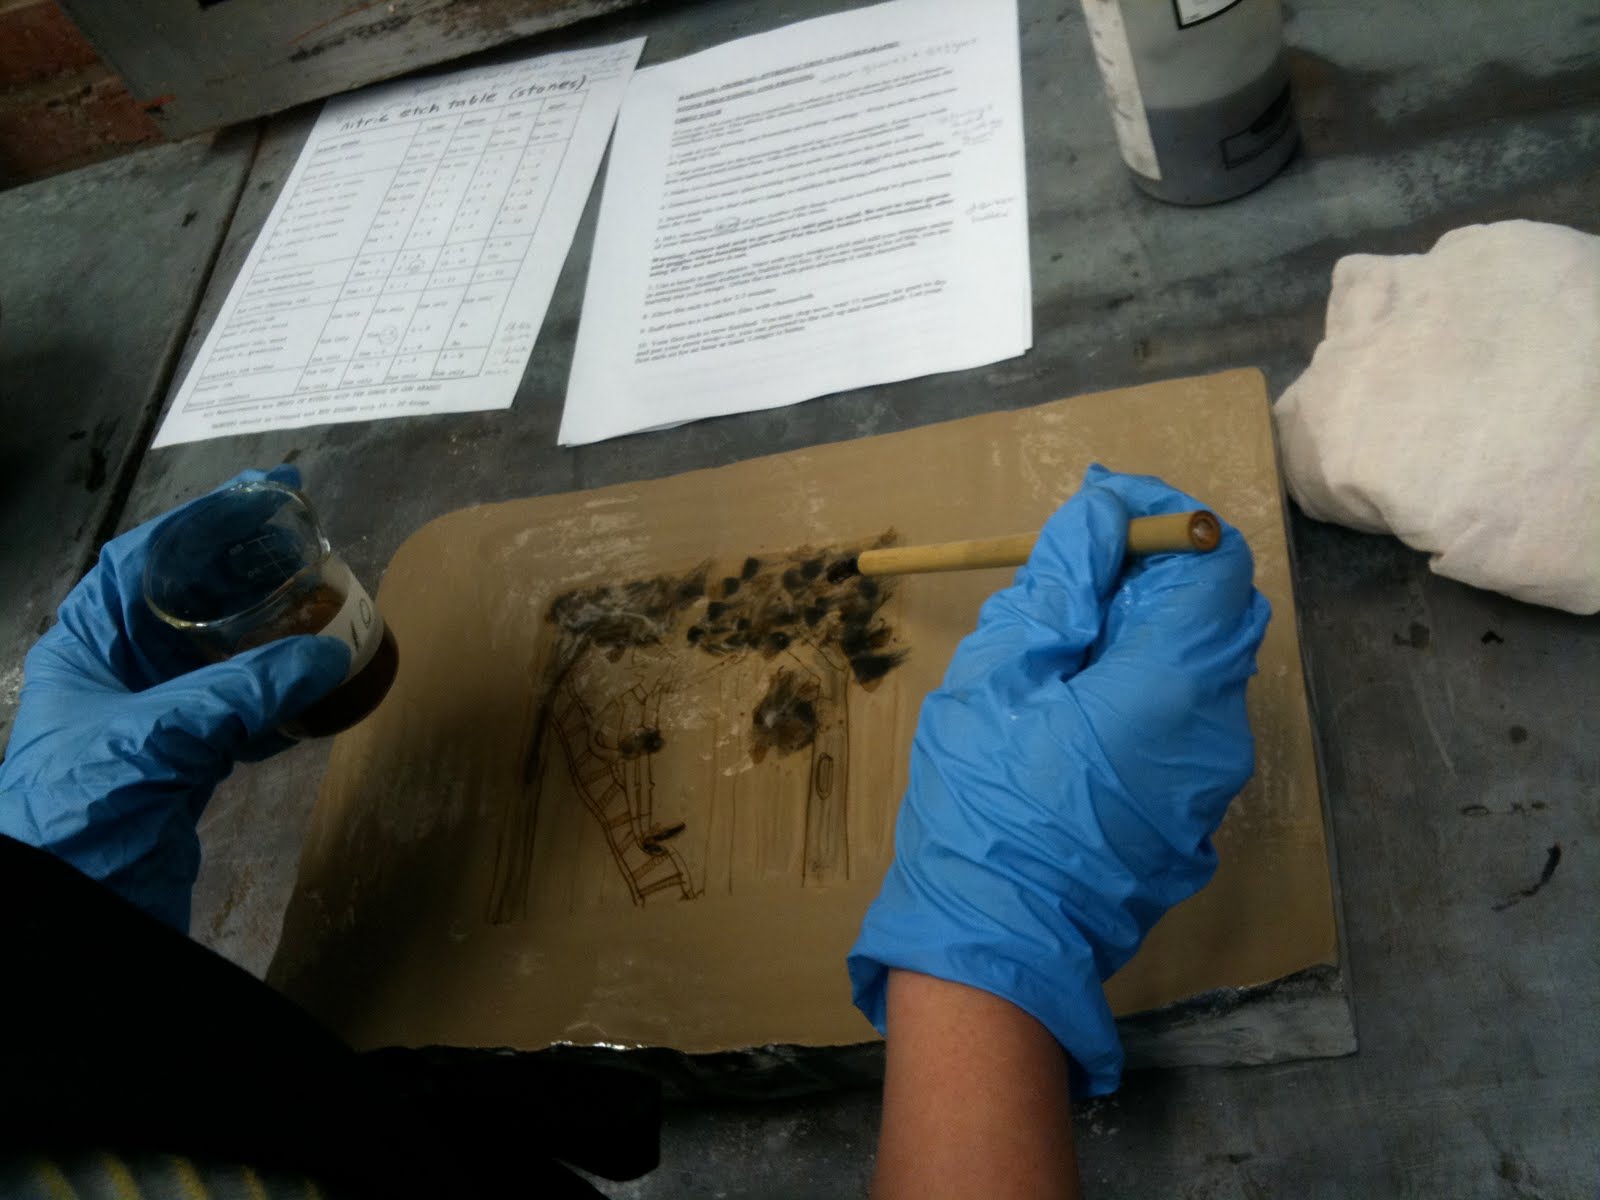
Apply the etch with a brush.

Let it sit, and then buff it down tight with a rolled cheesecloth.

This needs to sit for at least an hour, during which, you can set up for the second etch.

Set up 1803 ink, water bowls, and sponges.


Wipe out image with Ispoar G.


Rub asphaltum over image (this is where I probably ruined it- you aren't supposed to use as much as I did here).


Charge up roller, and then wash out the asphaltum with a dirty sponge.


Wipe stone with clean, damp sponge, then roll two passes of 1803 ink, then recharge the roller. Repeat this until the image is dark.

Fan dry the stone.


Talc and Rosin again.


Repeat the etch steps again.


Set up the press. Make sure the stone is in the center, up against the woodblocks, and lined up with the scraper bar.


Tear your paper, and set up the marks on the press that tell you when to put the pressure on and off.


Roll out 2244 ink.

Wash out image with Isopar G again.


Rub asphaltum again.


Wash out with dirty sponge.
Now repeat the clean sponge and ink roller passes. Here's a video of me printing at Open Studio Night:
Whew! The end!
adios
caitlin
1 comment:
I had no idea it was THIS complicated. All the power to you, looks like a blast.
Post a Comment